Tuesday, April 26, 2011

Tick Tock Tiles

Silhouettes of the Joy tiles cast their eerie shadow on my broken kiln shelves, two reminders that working in ceramics really is playing with fire, in more ways than one!

The past couple of weeks have been a tempest of tile tribulation to create, package and ship 140 custom ceramic tiles for the Michigan Model Madness Spring Show 2011. Ordinarily, this would have been a routine project if not for the fact that it lacked the two most important components to ceramic production: predictability and time. 

Why? Because this commission required the use of entirely new clay and new glazes, so I had no idea how they would behave or what to expect. In terms of time, Pop's situation essentially consumed all of March and a goodly part of April. Translation: the ample time I thought I had when I accepted the commission unexpectedly and quickly flew out the door like the Concorde on crack. 

Predictability and time also combine together in ways important to ceramic production. For instance, new materials require a series of tests to identify their quirks and how to work around them to engineer some degree of predictability, and that can take a goodly amount of time.
 
In particular, new glazes are especially test-worthy since any number of variables can affect the outcome, from how they're applied to the individual idiosyncrasies of each kiln to how the shelves are stacked to where the piece is located in the kiln, among many more. Remember, glaze is a combination of minerals (with glass) and so it doesn't just melt onto the bisque piece, but undergoes a series of chemical reactions during the fire - and we all know how touchy chemical reactions can be. 

In fact, Lynn, Lesli, Joan and myself ran a series of tests a few years back with each of us firing the very same glazes applied the very same way (even to the very same tile) in each of our respective kilns. Lo and behold, each test tile came out differently! For my purposes, I discovered that Big Al loves the colors blue, teal and green, bringing those tones out of any glaze consistently (compelling Lynn to coin the term "Big Blue" for him!). Even Big Al and Maury fire the same glazes quite differently, with Maury favoring the brown/orange/red end of the spectrum.

So after all was said and done by April, I was left with an April 25 deadline to get these award tiles in the mail, which is about as tight a deadline for ceramic tiles as imaginable in a bad nightmare, due entirely to the time component in creating them. Let me break the panic down for you:
  • 1-2 days: pressing 140 tiles
  • 7-10 days: tiles drying
  • 2-3 days: glaze fire and cooling
  • 1-3 days: tying on ribbons, packaging and packing for shipment
  • 5-7 days: shipping
Altogether, these numbers meant only one thing: there was no time to test anything - it was full bore or nothing. But when it comes to ceramics, that's playing with fiery fate. Should anything go wrong, there wouldn't be time to repeat the time-laden process of making more, and so the show simply wouldn't have its awards and my name would be mud - and not in a good way. So I set out to work like the wind, making extras as "just in case" back-ups.

I like to use bisque tiles as pressing plates for the stamped clay. Don't use the glazed ones since the clay will stick to them!


Here are the regulars in the process (clockwise from top left): baby powder, "Sir Squish" my tile press, the custom stamp made from my design, and the cut-out clay on the pressing plate.


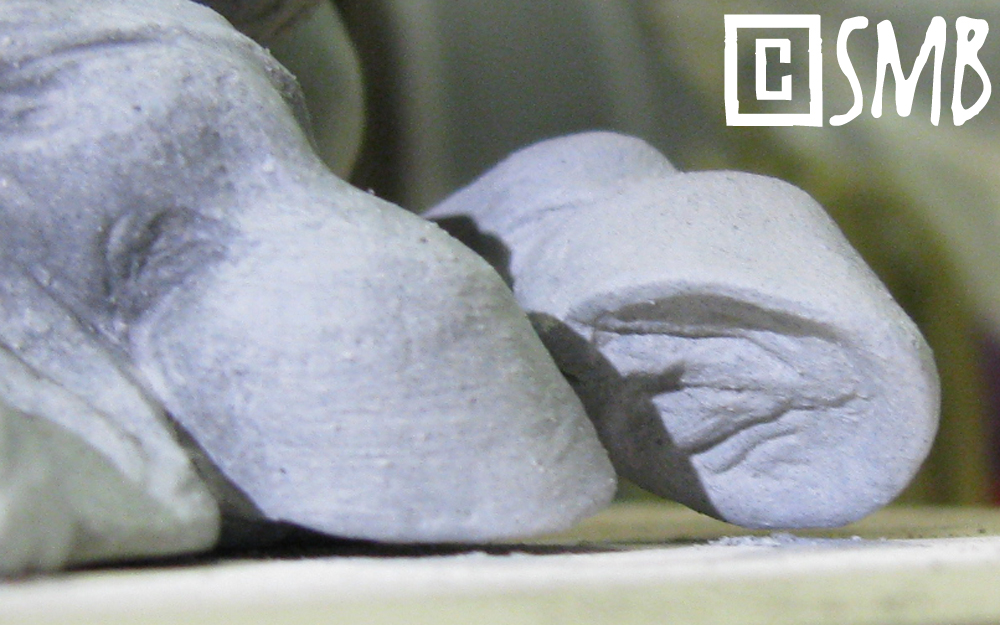
There's Sir Squish pressing the stamp into the clay. Thanks to his gear box, it takes very little pressure on the lever to exact a lot of force onto the clay. Trust me when I tell you that a tile press is required for this process - attempting to do so with your strength or body weight not only produces a lousy result, but your body will hate you the next day. While you think the clay is soft and gooshy, it's remarkably resistant to stamping on this scale.


Then I pull off the plate and stamp the back. Clearly, I need a new stamp for the back. Drat. It's interesting that stamps behave in different ways even with each design or clay. Note to self.


Repeat 140 times and voilĂ ! The clay tiles dry sandwiched between drywall boards to keep them flat and to suck out the moisture evenly. Yet the both the predictability monster and time monster chose to raise their heads at this stage, since this particular clay presented an unwanted surprise: it took 14 days to dry, even after being placed in a room made hotter by a space heater! The clay was so wet and dense, it nearly doubled the drying time! Argh. In the end, I was forced to fire about 25% of them still semi-damp because I just couldn't wait any longer. The good news was that they fired just fine, but lemme tell ya...it was pins n' needles! Thank goodness for the "slow" fire program on Big Al! I also believe the clay being low-fire earthenware clay worked in my favor because it's more porous and forgiving. I'm not sure they would have turned out okay had the clay been high-fire stoneware or porcelain.


All 140 had to be cleaned and bisque-fired, after which they needed to be glazed. The order called for 70 glazed green and 70 glazed violet, but since I didn't have these colors on hand, I had to buy them. In other words, I had no experience with these new glazes. Even more worrisome, one of these glazes - the violet - was a lead-free glaze.

Anyone who has worked in low-fire glazes knows that leaded glaze produces a superior result, having better refractive qualities and "pooling" abilities. In short, it looks better and behaves better than unleaded glazes. This is because the lead in the glaze forces  the components to move, smoothing them out and making the minerals "pool" inside the crevices, a feature that beautifully amplifies a stamped, sculpted or carved design in the clay. Being leaded, the green glaze ordered for this commission was a perfect example of the benefits of leaded glaze:

 Amaco F-47 Christmas Tree Green, a leaded glaze. It just doesn't get any better than this, folks! Notice how glassy, smooth and rich the color is, and how the pigment has pooled into the crevices left by the stamp, making the design "pop." The fun thing about this glaze, too, is that it's probably named after its intention, that of the quintessential "mudhen" project, the ceramic Christmas Tree!


 Some of the bisque tiles with the violet glaze, before the glaze fire. What you see now isn't the actual glaze, but the dye added to the glaze so you can see where you applied it.


In contrast, the violet glaze, Amaco F-70 Violet, ended up being a fiendish headache, creating the second unexpected hiccup. Why? Because it's a lead-free glaze. This means that rather than moving around during the fire, the pigment stays put, resulting in a flat, dull finish that does nothing to flatter the stamped design. In fact, it can obscure it completely! For example, here's the unleaded violet out of the glaze fire (quite a contrast to the leaded green, huh?)...

While the color itself was pretty, the glaze's effect was...in a word...disgusting. Yes. Disgusting. To go through all that work and expense creating the stamp design, and then stamping and cleaning and glazing...to then end up with this was definitely an unpleasant experience. There was no way I was sending this to the show. So I had to fix them. All 70. And the clock was ticking.


Luckily my years of experimenting with glazes paid off because I now had an arsenal of potential fixes for these 70 deeply offensive violet tiles. I knew that Duncan CR 823 Celadon Crackle Glaze could fix just about any low-fire glaze problem. However, I also knew it would create a greenish-blueish pooling of color that veered from the violet that was ordered. What to do?

I finally settled on creating a wash of leaded glaze in in the same color family as the violet, but with a contrasting leaded color added to provide "pop." This wash would force the unleaded glaze to move, and the contrasting color would create an artificial pooling of color. In this case I mixed Mayco AG-263 Purple Iris with Mayco Exotic E-103 Midnight Mist together in an 80/20 ratio and thinned it with water to about the consistency of skim milk and brushed it on, right over the fired glaze. I then put them through a second glaze fire. 

After I pulled them out, I could see I was on the right track, but I wasn't aggressive enough - that Amaco violet needed a major smack down! So I repeated the process, but added more of the Midnight Mist to the mix and applied said mix thicker...then ran them through a third glaze fire. The situation was dire at this point, since I knew this would be their final fire - there just wasn't any more time. It was Saturday, and they all had to go out on Monday, and a glaze fire takes a minimum of two days between firing and cooling.

Lucky for me, that bolder treatment did the trick! I pulled them out of Big Al with kitchen mitts to cool them faster so I could package and pack them for shipment that day. You think hot cookies are tricky? Try pulling seventy 192˚ tiles out of a gaping, hot kiln!

Here's the final result of those fixes. Quite an improvement, eh? Leaded glaze, you are my bestest low-fire friend! Unleaded low-fire glaze, you are my sworn enemy! Get thee behind me!

Interestingly enough, however, the problems with unleaded glaze don't really exist with high-fire glazes because all that added heat forces the glaze to move despite the lack of lead. The issue only presents a problem for the low-fire folks, especially since most of the leaded low-fire glazes are now switching over to unleaded formulations. This may be because low-fire glazes are used more for craft rather than "real" ceramics, so manufacturers want a more benign formula.

But this puts me in a pickle for show awards. I chose low-fire earthenware clay for this project because it has a near-zero loss to warping, which means that all the stamped tiles will be usable, and I know they'll be usable before I apply glaze to them (because low-fire clay is brought to maturity first, then glaze fired at a lower temperature afterward). As such, I can keep costs down for the show holder who commissions them. In contrast, high-fire stoneware has about a 33% loss rate to warping, but I find that out only after I've put them through the glaze fire (because high-fire clay must be brought to maturity with its glaze). So I now have to decide which is more feasible if leaded glaze may no longer be an option with the low-fire clay.

Anyway, despite all this scrambling and stress, I have to tell the truth - I've enjoyed this project immensely. That may seem counter-intuitive, but most of my studio is run by fuzzy deadlines of my own making, and being so, they tend to get fudged as I dodge the monkey wrenches life randomly heaves my way. Also the unpleasant upheaval caused by my Dad's situation has been a tornado of anxiety, but this project gave me something to cling onto as a goal. Something firm. So in many ways, this project's hard deadline kept me centered and was a refreshing "reality check" of sorts. Plus, the fruits of my freak out were well worth it:

70 lovely green tiles and 70 lovely violet tiles were put in the mail on Monday. Now I pray they arrive safely! Thank you Melissa for this opportunity, not only to create awards for your show, but to learn a great deal about the media and myself in the process!

But I can't relax for long - now is just the eye of the storm. This weekend, Laurie Jo decends to judge a local show and she's staying with us. I expect by Monday I'll have lost my voice and my face will ache from laughing. So before she arrives, I have to madly clean my house because, since March, it's sunk into an audacious catastrophe! 

Mind you, I still have to finish Mr. Pony to boot, and then start the BOYCC swag bag tiles. No wonder then that I have that Jurassic Park scene running through my head.

"You build up resistance to stress by learning, acquiring and practicing skills needed to go forward and cope." ~ Dr. Donald Meichenbaum

Share/Bookmark

Thursday, April 21, 2011

Tools of the Trade

 A sneak peek at one of the rascals who started all this! Yeah, I bet you can figure out what kind of animal this is...well WELL WELL!

The most important - the best - tools of any artist are the mind, the soul, and the imagination. No art can emerge without this creative trifecta. But in order to materialize their alchemy, an artist needs tools.

Luckily we're born with the  most exceptional tools imaginable - our hands! Personally, I interpret this as a sign that nature designed us to be creative. Honestly, all good things in human nature come from positive creativity, perhaps because it requires openness, humility, joy, reflection, and respect for the internal world of others. So I find it no surprise that lots of good things derive from creativity, some of which I wrote about in a 2010 article:

Studies show that our brains slip into a meditative state and release serotonin, dopamine, norepinephrine and beta-endorphins when immersed in creativity. And the more we engage it, the stronger that positive feedback loop becomes cemented into our neural net. Quite literally, we become addicted to our creativity. The effect can be so profound that our brains actually re-wire themselves to expedite these pathways. For this reason, artists tend to be most balanced when allowed to work in the studio on a regular basis. It’s why we derive such deep, penetrating joy from our creativity.

Experiencing this effect on a daily basis, I've long thought that every person should have some form of positive creative outlet. But creativity doesn't mean just visual art, but anything that requires the implementation of creative expression, from writing, cooking, dancing, gardening, music, architecture, etc. Putting our hands to work to express our inner selves gifts us with a path, a profundity, and a voice...and don't those things stew in the human soul by nature?

On the left is my ever-handy Microstamp® logo stamp I use for sculpture. Lynn Fraley referred me to their product and I can vouch that it's fantastic! It'll be a lifetime tool. On the right, with the goldfish floatin' around inside, is one of the minions of Page Up® paper holders that populate the studio.

But I digress...back to tools. Such gizmos are the means by which our voices can be expressed and they range from the humble hand to the found object to the custom-made contraption. Every artist has a pile of tools and often an even more exclusive group of favorite ones. Tools also can be as unique as the artist, revealing quite a bit about how he or she works simply by its condition or design. Each art form demands its own set of specialized tools, too, and even different media can demand specific implements. 

Since I work in such varied media, most of my studio is strewn with various tools...they are taking over! But that's OK...they're my little partners in this madness. So along those lines, I thought you might be interested in the tools I've been using to create Mr. Pony, and his future ilk...
 
 Here's a line-up of the usual suspects. "B" has little balls on each end, which are really useful for details, especially inside nostrils and ears. "C" is my steady partner for all clays, and my primary sculpting tool for epoxy (its epoxy partner is encrusted in the stuff!). D-H are various loop tools. "J" is my ever-present set of calipers - I have five of them so I'm never without! "K" is my Microstamp®. L-M are my various smoothing brushes for earth clay ("L" is that flat brush I mentioned for the veining yesterday).

 
Here's "A" from above. This custom-made tool from Bison Studios was a gift from Joan Berkwitz a couple of years ago and has proven to be indispensable! So much so that if you see it covered in clay, you know I've been working in the ceramic studio. I even kept the cool box it came in!

Here's "I" from the line-up. This tool was a gift from Lesli Kathman, one she made herself. The interesting thing about this puppy is that you can make a whole slew for yourself, too! Just take bass guitar wire and some brass tubing (available in many hobby stores). Simply bend the wire into the shapes you want and insert the loop into the tube, and crimp the tube ends with needle-nose pliers. Super for earth and oil clay! It also leaves a really appealing tool mark, which I plan to leave on some ceramic pieces.

 
 Youth Taming the Wild, Anna Hyatt Huntington, stone, 1927. Brookgreen Gardens, October 2009.

I'm sure as I develop this line of work over the years, new little partners will be added to the party. I can't wait! I have a deep fondness for my tools...they represent so many memories past and more to come. Each one has a story and each one plays a part in mine. So here's to our tools! Always dependable and at the ready to help us forge our path! Hazzah!

"Let the technical skills you acquire guide your hand but also have the courage to listen to your heart." ~ Ted Smuskiewicz


Share/Bookmark

Tuesday, April 19, 2011

A Final Fiddly Bit


Now that I've processed those revelations thus far, I had another challenge regarding details: veins and moles. These two features aren't all that easy to sculpt, in any medium. 

Anatomically, their design makes them a real challenge to translate because they're complex and fleshy. Veins also are bilaterally symmetrical and the major ones follow prescribed anatomical patterns, meaning that I can't just slap them on any which way. Veins also are dependent on the specific situation of the "moment," and even are influenced by the breed depicted as some breeds have "thinner" skin than others.

On the other side of the coin, veins and moles have artistic concerns. They're a study of balance, of achieving a delicate harmony between subtlety and emphasis. Scale also plays a big role because gigantism in these features will surely sink Mr. Pony as surely as putting elephant ears on him!

So early in the sculpting process, I wondered how to achieve these features in clay because I tend to add them later, rather than sculpt them as I go. But the problem with clay is that complications arise when applying delicate bits after the fact, which I won't go into because it's rather technical...let's just say it's tricky.

As an experimental workaround, I decided to carve a series of grooves where I wanted the veins to go, to give more surface area and a "seat" for the new clay.

 Here you can see what I mean by the grooves.

 Here's a close-up.

I dampened those areas with a wet brush, waited a minute, and then dotted slip along the grooves with a fine flat brush, just to get the clay mass onto the body. I let those areas dry a bit, and then sprayed them with a light mist of water from a spray bottle to infuse a degree of "give" and "life."

I then used a sculpting tool to define and clean them up, also fiddling with them to blend them into the body. After letting them dry a bit to "rest," I gently smoothed them with my brush to set them "back" into the skin - and voilĂ !

 
 Finished veins and moles.

I'm really happy with how they turned out! The veins have a good degree of fleshiness and a nice balance in intensity. As you can see, the moles are more suggested, which I think works better for clay. If they crack as they dry, I'll just repair them with more slip. The biggie is firing -- I hope all this doesn't pop off! Hey, it can happen. But I'm hoping the "seating" will help them cling on, like anemones to a rock. So tomorrow - to connect him to his vase tube!

"The world becomes fresh and hopeful and new, when we create." ~ Lynda Lehmann
 
NEWS FLASH: BOYCC has some registration openings, so if you've been thinking about going, now is your opportunity! Don't miss it! Free workshops and seminars, catered meals, lots of swag and goodies to win, gobs of gorgeous "shiny ponies" and great times with great people! For more information, go to the BOYCC website.

Share/Bookmark

Monday, April 18, 2011

Fiddly Revelations

The BOYCC centerpiece pony is almost done!

I'm in the home stretch! Many sculptors know this as the "fiddly bits," the stage where attention must be paid to little details, final adjustments and loose ends. So close! And I'm happy to report that earth clay accepts and holds detail just as good as epoxy, and better than oil clay.

Also at this point is the smoothing process. When I work in epoxy or oil clay, I use a solvent with a soft, artificial brush to smooth out the surface, softening the tooled features and creating a nice burnished surface. For epoxy I use rubbing alcohol and for oil clay I use Goo Gone. Yet despite the seeming ease this implies, smoothing can be quite tedious with oil clay and epoxy. Indeed, it can take hours, even days in the case of epoxy, which also may require sanding once the material has cured.

On the other hand, such drudgery doesn't exist with earth clay! This stuff takes to it so well, in fact, that this otherwise dreaded step becomes a delight. Even better, I get to use just plain ol' wholesome water instead of smelly chemicals. Better still - no sanding or using the Dremel tool. To add the cherry on top, being able to go back and tweak even days after a session is a novel concept for someone seasoned in  self-hardening epoxy clay. Without a doubt, for me, there just isn't any better sculpting medium than this glorious goop - humble mud.

Nonetheless, I still was concerned how it would respond to smoothing. Tiny details are important on a large piece such as this and, more importantly, this clay is full of grog. So would these details melt away? Would the brush scour them off even with a light touch? Would the grog hose it all up? 

The good news is: "no," "no," and "no." The clay took to smoothing just fine, and in fact far better than oil clay and almost as good as epoxy. This is a revelation. But looking at him now, I admit...I rather liked the tool marks. I miss them. Another revelation. And sure, groggy bits are here and there, but I like them. They speak to the media and the process. More revelation.

I deduced that the clay took to smoothing so well because, like epoxy, it's capable of being "melted" in place to set the details back "into" the surface.  In contrast, oil clay responds to this method by simply getting more gooey and messy, and so its detailed edges have to be softened around, like icing around the sides of a cake. All this means that the fiddly steps go much slower with oil clay. For example, it can take me a few hours to smooth an oil clay plaque, like Reflective, but only about 30 minutes to smooth Mr. Pony.

I also discovered two more bonuses unique to earth clay. First is the ease of sculpting manes and tails. This may not seem like a big deal, but trust me - it is to me. I've long struggled with hair and still consider it the hardest feature to sculpt. That may seem counter-intuitive, but believe me when I tell you that it's outrageously complicated. 

This is because the flow of hair is both passive and random, dependent entirely on the physics of the "moment" between the horse's moving body and the physical reality that a horse lives in, to include centrifugal force, wind, objects, knots, etc. Moreover, not only does hair have texture, but it's comprised of individual strands that combine into layers and clumps that all work together to create elaborate effects within the flow. In short, hair is chaos in motion. So any interpretive hiccup that contradicts all this will compromise the illusion, as seen in many nice realistic sculptures weakened by an ineffective translation of hair. I know - I created many of them in my early work!

Adding even more to this complex brew, the flow of the mane and tail is an important design feature for the composition of any piece. Honestly, they can make or break a sculpture. So beyond all the physical concerns, convoluted artistic considerations exist, too. What all this means is that I can't just slap on a mane and tail any which way I feel like because they first require context and composition.

Predictably then, I've stumbled clumsily through many hair variations from the "soft serve," rope-look (or "big hair," which in hindsight I cringe, "What was I thinking?"), to the  drippy-look, to the sheet-look, and to anything in between. Only recently have I been achieving something closer to my goals, notably seen with Elsie

Clay is the only media that allows me to achieve the hair effects I've wanted all along...effortlessly!

Yet with Mr. Pony, I realize now that the problem wasn't me - it was the media! Both oil clay and epoxy lend themselves to the rope-look because of how they behave under the pressure of a sculpting tool. But earth clay is entirely different in that it doesn't "rope-out" under tool pressure and, fortuitously, it breaks. I say this because the unpredictable bits that bust off create the random look of hair far better and easier. In a sense, it's the clay that sculpts the mane and tail with my hand being only a compositional guide. Yet another revelation, and one I'll take back to epoxy and oil clay.

Second has been the palmar foot, or the underside of the horse's hoof that has the frog, sole, bars and toe callus. Despite appearances, this feature also is difficult to capture in epoxy and oil clay because of its natural texture, effects of abrasion and soil clinging to it. The problem is that both epoxy and oil clay want to be smooth under the sculpting tool and solvent, in direct contrast to some of the features of the palmar foot, which means I have to sculpt texture back into this area.

The palmar foot, rendered far better in clay!

Yet with earth clay, the opposite is true. So if I let the clay harden a bit, I simply use a blade-like sculpting tool to carve out the palmar foot, letting bits break off as needed and bingo - realistic textures where they need to be, automatically. Also produced is the realistic look of abrasion, exfoliation and soil, important details that are difficult to recreate in epoxy or oil clay. Another revelation.

A studio revelation: If I'm going to make a habit out of this art form, I definitely need a new ceramic sculpting set up! Those preciously stacked tiles and the need to contort my posture to accommodate the clamp light have gotta go. I'm shopping for sculpting pedestals this week and toying with better lighting arrangements.
 
All said, however, I'm happy to report that Mr. Pony isn't done teaching me yet. More on that tomorrow, so stay tuned! Same muddy time, same muddy channel!

"Achievements of life are momentary, but realizations are longer lasting." 
~  Avtarjeet Dhanjal 

Share/Bookmark

Friday, April 15, 2011

Husking a Pony

Sculpted solid, this guy has to be hollowed out. The only way to do that with him is to cut him in half and scoop out his innards. His position is a bit creepy, I admit, as though he's tucked his forelegs to make room for the blade! Yikes!

Ceramics isn't all about free-spirited creativity, it's about chemistry, too. Everything from the molecular composition of this stuff to how the whole glob behaves during the fire plays an important role in the design and execution of each piece.

In particular, the escape of air and water molecules from the claybody during the fire often lies at the forefront of many ceramists' priorities. At such high "cooking" temperatures, escaping air and moisture can increase the pressure within the rigid claybody, causing the piece to explode in the kiln. And the more vitreous the clay, the greater the danger. 

This is why it's so important to make sure air bubbles aren't present within the clay and that the piece is completely dry, right to the core, before firing. To further mediate these concerns, hand-built pieces like this also need to be slowly fired, to give all the clay components time to gently acclimate to their physical changes. Working in mud incorporates so many variables, that always erring on the side of caution wrestles back a fair amount of predictability.

What does all this mean for Mr. Pony? It means that because I sculpted him solid, he has to be hollowed out, like a chocolate Easter bunny. If I left him solid, it would take months for him to truly dry right to his core, but even then all that inner mass presents a threat of explosion nonetheless. It's just safer to hollow him out, to ensure complete drying and to minimize the possibility of air bubbles busting him into pieces.

The other option would have been to build him around wadded newspaper or similar filler material that would burn out during the fire. However, there are new problems introduced by that method, which really aren't compatible with my way of working. But most of all, I don't want the smoke produced from the burn out to migrate into the house since my kiln is in the garage.

Anyway...onward...I waited until he was rather harder than ideal, so I had to use a hacksaw instead of a wire to cut him in half, but it was easy work regardless (much to my relief). 

Here you can see what a chunk he was! What I like about working solid is that it allows me complete freedom to manhandle the piece, and shape the body exactly as I want to, without worrying about breaking through or distorting a hollow body.

Then using a dull knife and scooping tool, I proceeded to hollow this guy out in about 45 minutes. To be honest, it was enjoyable. There's something satisfying about the process, of sculpting the inside as well as the outside.

Mr. Pony "husked out," with a hole on his underside for the escape of hot air. I got the momentary yen to turn him into a whistle, but I'll leave that for another piece.

Hollowing also reduces weight, which will be important for future pieces that are supported by legs. What I think I'll do in the future for those designs is to create a hollowed torso ahead of time, then add the head, neck and legs later, with a pillar on the belly for support. We'll see how that goes!

The joining edges of both sides need to be scored with a tool, dampened with water and then have lots of slip applied. This provides both the "tooth" and the "glue" to piece him back together. Then I squish the two halves back together, and fill the gaps with slip. I carved a little heart into the inside surface of his body, just for kicks. I think I'll do that on all these hand-built pieces.

Here he is, rejoined together and hollow. He also sports his roughed-out mane.

Once I get his mane done, all his little details finished and him completely smoothed out, I can attach the "tube"...

 
 A kitchen gadget doubles as a tube-maker! I wedged some of the scraps and ran the blob through "Derby," my slab roller. When the piece is drier, I can shape it and clean it up. I may even do a bit of decorative carving if I feel inclined.

I'm having such a great time creating this guy! I hope to have him finished by tomorrow, so he can just sit and dry for about three weeks while to move onto other waiting projects. I'll fire him first to see if he survives, and if he does I'm going to start another! If he doesn't, I will have learned what not to do for the next piece.

"You can count how many seeds are in the apple, but not how many apples are in the seed." ~ Ken Kesey

Share/Bookmark

Thursday, April 14, 2011

I Am In True Love

For those of you who know horses, that familiar "upper lipping" horses do adds moment to this piece.

If you've been following my Facebook studio page, you're familiar with a new project I've spontaneously undertaken. And I say "spontaneously" in the purest sense of the word. I've never done anything like this before and took off on a whim, spurred by a moment's inspiration. In this unthinking act, I found true love in the creative process.

But let me backtrack a bit...a couple of years ago, two dear friends conceived of a new show format that was, well, wonderful and revolutionary. I'm a sucker for clever minds conspiring for a happier future, so of course I was in full support! The focus of this event, BOYCC, is the ceramic expression of the equine, an art form right up my alley.

Subsequently, last year I was asked to create pieces for the "swag bag" given to each paid entrant. After much thought, I decided on a special custom hanging tile (which I'll document in coming weeks).

More interestingly, however, I was invited to create a table centerpiece for one of the sit-down meals. This took a lot of cogitation, but either concepts ended up sidelined, or left for other projects. I was starting to sweat, since BOYCC is just over one month away. But the Universe has a way of quietly leading us in the right direction, and boy...did that vast, star-studded expanse hit pay dirt this time! 

To set it up for you, I can trace three things that lined up like runway lights to point me in the right direction (funny how the mind and muse work). First, I've been working on goofy little sculptures for a friend over the past month, which I'll unveil in due time. Second is the process of "claybody customizing" in which a slip-cast clay piece is altered while the clay is wet, fresh greenware. And third is the work of Susan Leyland, of which I greatly admire.

So on Tuesday, there I sat in my ceramic studio becoming increasingly irritated with myself for not having a workable idea, let alone inspiration, for the centerpiece. Cue big sigh and eye roll...add self-loathing. Then my eyes slipped over to the bucket of leftover earthenware clay from tile pressing...and kerPOW! It hit me. Like my creative life flashing before me. Not only was the idea fully formed in my head, but all the possibilities it introduced flooded my sensibilities.

And when I say my "creative life flashing before me," I mean it literally. Not to be melodramatic (OK, so I am here, but what the heck), it was as though some part of my aesthetic died instantly and another was reborn in its place. I sit here now utterly flabbergasted at this new vision teeming inside my mind. Why had this not occurred to me before? Perhaps I didn't feel ready. Maybe I was a little to cautious. Probably I was too creatively narrow-minded. And it could be that all things come in their own time, even art.

And believe me when I tell you it's time because what has erupted before my eyes, seemingly without effort, has been this quirky pony, a one-of-a-kind original in earthenware clay. He's going to be a vase, with a "tube" of clay beside him to hold flowers, lollipops, pens, or what-have-you.

Here he is, roughed out. Ceramic clay is so accommodating, it took me only two and a half hours to get to this point. And trust me when I tell you those hours felt like minutes.

The feel of the wet, pure clay and how it flows and reacts to my fingers is nothing short of pure love. There truly is no other sculpting medium like it. I've used just about all kinds of clay - epoxy, waxy clay, metal clay, oil clay, baked clay, polymer clay and paper clay - and nothing compares to this. It's magical. How could something so simple, essentially just dirt and water, be so exquisitely perfect for sculpting? This wondrous stuff and my heart are singing in unison as my fingers shape this earthy delight.
  
One thing that's needed by the bucketful is thick, pasty slip to glue all the pieces of the growing sculpture together. But you have to use slip made from the very same clay you're sculpting in; otherwise the whole thing could bust apart in the fire. The solution? Store all your clay shavings and leftover bits in a way that keeps them damp. Then take a handy hand mixer, add water and whip up your own dollops of suitably compatible slip! If you let this dry more, you also later end up with clumps of usable clay for sculpting, or slab rolling.

What also has been particularly enjoyable is the sharp departure this pony represents to my usual work, not only in approach but in concept. Here we have a realistically sculpted pony, but doing something rather, well, unlikely at best - sitting truly upright and "lipping" his knees. This blend of whimsy and realism has ignited a creative atomic bomb in my head, and now my mind is bursting with all sorts of fun or stylized ideas to express through this new modus operandi. Hey, I've been creating realism for over twenty years, so why not venture into new aspects of applying it? This media uniquely allows me to do just that because it responds to the creative moment far better than any other sculpting media I've used. It's easy, fun, quick, cooperative and organic.

So the ease with which this little guy has materialized has been eerie. I've only had to refer to reference photos once (for the hind legs), but overall this piece has almost entirely been created from memory. My hands are simply following what the clay asks me to do. How is this possible? Am I not sculpting him? Or is he? Is the clay? Something else?

Another view of this fellow a little further along in the sculpting process. This clay is responsive in a way no other media is, allowing even the subtlest flicks of the tool or finger to capture a feature in perfect intensity. Yet at the same time, building up bulk and shaping the big ideas couldn't be easier! When I'm satisfied completely with the "tooling" process, I'll use a soft paint brush and water to smooth the surface.

Thanks to this pugnacious fellow, I've found a new way to create work, and I'm completely obsessed with making more. The thought of creating originals, quickly and fluidly, is exciting beyond belief! So over the next few blog posts, I'll walk you through the rest of his creation because I'm definitely learning as I go. 

Ultimately, though, it's not up to me. The pony has to survive Big Al (my kiln). Will he come through the bisque fire in pristine condition, or will he explode into a pile of spectacular bits? The Universe will decide. Such is the nature of clay.

But you can bet that I'll be elbow deep in ceramic clay, creating one-of-a-kind originals either for auction, or sale in my Etsy store. No realistic finishes either. Only art glaze or oxides to accentuate the sculpture and the media. This is my new path. A million thank yous, Universe!

"Art got its start
as a thumbprint
in the mud."
~ Bob Brendle

Share/Bookmark

Friday, April 8, 2011

Melancholy Me


A common sight in Idaho - a row of Harleys.

2011 has started off on a somber note here in the studio. A year that promised so much rebirth and revitalization has instead morphed into one of unease and reflection. 

In keeping with this unexpected mood, the Boise spring has taken on a mix of Seattle and Canadian weather. But I'm not complaining. I love overcast weather. My fair, sensitive skin really needs the soothing blanket of "Mother Ireland" rather than the arid deserts of Idaho. And while I adore the warmth of the sweet sun, I recoil in its rays. Its blaze turns me into a lobster, only without the fun bits like eyeballs on stalks, antennae and lots of little legs.

To me the misty, bleak atmosphere of an overcast day seems more honest than the garish sun blazing in a blue sky, and kinder than the bite of a winter's cold. It cloaks the valley in a forlorn grey -- a little mournful, a little mysterious, perhaps reminding us of regrets while at the same time offering hope. It's bittersweet, like life.

But if I tire of the hazy day...hey, our weather motto in Idaho is "wait ten minutes." Keeps things interesting. I don't think I could ever go back to the 365 days of nice California weather. Something about the seasons and mercurial weather here in Idaho feeds my creativity. It reminds me of the passage of time and how fleeting each moment really is. It asks me not to take a day for granted.

So last week, when we had a rare patch of sun in late afternoon, we hopped on the Harley to enjoy it. We took a nice leisurely ride to Idaho City and stopped at the Kodiak Grill for dinner. Of course other riders were out in force, too! As we left the restaurant, I snapped that photo (top) of the row of Harleys whose riders had the same idea we did. Enjoy the moment while you have it.

A north view of Lucky Peak Reservoir, coming home after dinner on an early overcast evening.

In that vein, I apologize for being remiss posting to this blog lately. Yet so much has happened in the last two months that have reminded me quite a bit about time lately.

One big reminder was a terrible accident with my father early March. He's alright (praise be!), but his situation has now changed all our lives. The years quietly take their toll on all of us. If we aren't careful, the sound of our life's clock is that of a ticking time bomb. The second reminder has been the diagnosis of Stage III cancer in a dear friend, seemingly out of the blue. So young and so vibrant! How could this be? Sneaky time, unfairly ticking out consequence right under our noses. The good news is she's doing just fine in treatment...something wonderful to cling to!

I'm still reeling from the shock of these two events, still trying to process them. Never forget how fragile and precious our lives truly are. Cherish each moment and each other.

Preparing my taxes also took me for a loop this year. How did April come so fast? We're nearly through the first quarter of 2011 and I've been, quite literally, totally taken by surprise. So many projects have consumed my attention that I just didn't pay attention to the days flying off the calendar. And still so many projects yet to be done! How will I find the time? Bitter irony. Note to self.

Another reminder is the countdown to the end of my hubby's temp job, which is coming quickly and we must be prepared. Yet with all that's come down lately, it's hard to get the creative gears going full bore again. I'm in a strange place of time stopped and simultaneously sped up.

Luckily the healing magic of mud has proven to be a welcome grease, so look for brand new tiles in my Etsy store soon, and perhaps with some new whimsical and unexpected additions, too. The smiley faces created in a special project have been a needed balm to my heavy heart.

It's no surprise then that PJ Harvey's new album Let England Shake has been an obsession of mine since I got it yesterday. It's been on a loop. Serendipitously, this album is in sync to my mood, fitting like a glove on my vexed soul. Only Harvey can create such singular, haunting, disturbing and yet enchanting music that gets inside your soul and lives there forever.

Here's a sneak peek of Dante, the Murgese stallion, with a headless Alfred in the background. Both are 1:24th scale. I'm eager to get back into the studio to finish these two patient fellows. 

So while treading despondency, I'm determined to channel my gleeful passions into my work. This year they will be vessels for my joy, embodiments of my defiance of time and all the sorrow and certainty it brings. Let them be a revelry of life, to carve my line in the sand in mockery of mortality.

"The soul would  have no rainbow if the eyes had no tears." ~Native American saying

Share/Bookmark
Related Posts with Thumbnails